This example shows how to use the Excel Import and Export component in a Windows Forms application.
以下代码展示了如何在 Windows Form 应用中使用导入和导出组件:
步骤:
- 按照 Installing and Configuring the Excel Import and Export Component 来安装 Excel 导入和导出组件
- 创建一个 Windows Forms 应用
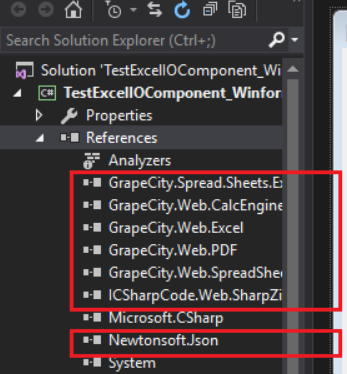
- 添加 "ExcelService" 目录下的 ExcelIO 程序集到工程中。
- 在界面上添加两个按钮,一个 RichTextBox,一个 OpenFileDialog 组件,和一个 SaveFileDialog。给添加的组件设置好 name 和文本。
- Add a license for the control before using the importer or exporter. For more information, see Adding a License for the Excel Import and Export Component.
- 按照 Adding a License for the Excel Import and Export Component 添加 License。
给两个按钮添加导入和导出逻辑,如下:
C#using GrapeCity.Spread.Sheets.ExcelIO; using GrapeCity.Windows.SpreadSheet.Data; using System; using System.IO; using System.Windows.Forms; // Add your license key // GrapeCity.Spread.Sheets.License.LicenseKey = "Your Key"; private void importBtn_Click(object sender, EventArgs e) { DialogResult result = this.openFileDialog1.ShowDialog(); if (result == DialogResult.OK) { using (Stream stream = File.Open(this.openFileDialog1.FileName, FileMode.Open)) { Importer importer = new Importer(); this.resultRtb.Text = importer.ImportExcel(stream); } } } private void exportBtn_Click(object sender, EventArgs e) { DialogResult result = this.saveFileDialog1.ShowDialog(); if (result == DialogResult.OK) { using (FileStream fs = File.Create(this.saveFileDialog1.FileName)) { Exporter exporter = new Exporter(this.resultRtb.Text); exporter.SaveExcel(fs, ExcelFileFormat.XLSX, ExcelSaveFlags.NoFlagsSet); } } }- 按下键盘上的 F5 来运行该程序
- 点击 Export Excel 按钮来导出 Excel 文件。