快速入门
下面的快速入门指南的目的是让你熟悉并尝试运行WPF及Silverlight版本的控件。在这个快速入门中,您将从在Visual
Studio中创建一个新的工程开始,并向您的应用程序添加C1DataGrid,之后添加一个数据源。然后,您将转到Microsoft
Expression Blend中完成绑定grid至数据源的操作,自定义grid。最后运行该grid程序以观察运行时交互。
第一步:将C1DataGrid添加到您的工程
在这一步中,您会从使用WPF版本的DataGrid在Visual Studio中创建一个grid应用开始入手。当您添加了C1DataGrid控件至您的应用程序,您将有一个完整的,功能性的grid。您可以进一步的为您的应用程序自定义grid。
为了设置您的工程并添加一个C1DataGrid控件至您的应用程序,请完成以下步骤:
- 在Visual Studio中创建一个新的WPF项目。
- 导航到工具箱,双击C1DataGrid 图标以添加grid控件至Window1。
- 调整窗体的大小以及窗体内包含的C1DataGrid 的大小;调整完成之后应该如下图所示:
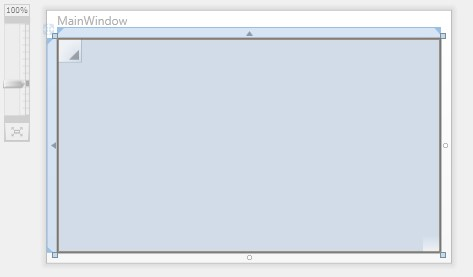
- 通过设置Name属性给C1DataGrid控件命名为"ProductsDataGrid"。
您所完成的步骤您所完成的步骤
运行该应用程序,可以观察到grid应用程序的外观类似以下图像所示:
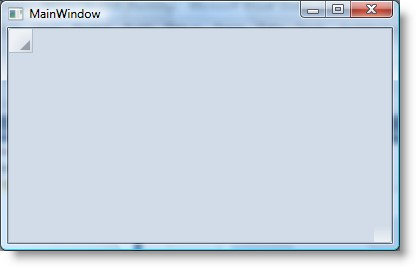
您已经成功地创建了一个非常基本的grid应用程序,但grid仍然还是是空白的。在下一步中,您将添加一个数据源到您的项目,并将grid绑定到数据源。
第二步:创建数据模型
在最后一步中,您建立了grid应用程序,但基本的grid是功能性的,它不包含任何数据。在这一步中,您将添加一个数据模型至您的项目,您将在稍后使用该数据模型以生成显示在C1DataGrid控件中的数据。
- 为了添加数据模型,须完成下列步骤:
- 右键单击项目节点并选择Add | Class….
- 将该类命名为Product.cs并单击OK。
替换所生成的Product类的代码为以下:
C#
public class Product
<ac:structured-macro ac:name="unmigrated-wiki-markup" ac:schema-version="1" ac:macro-id="4dce1d39-f99f-4b64-86a4-2066d29037d4"><ac:plain-text-body><![CDATA[{ static Random _rnd = new Random(); static string[] _names = "Macko|Surfair|Pocohey|Studeby".Split('|'); static string[] _lines = "Computers|Washers|Stoves|Cars".Split('|'); static string[] _colors = "Red|Green|Blue|White".Split('|');
]]></ac:plain-text-body></ac:structured-macro>
public Product()
{
<ac:structured-macro ac:name="unmigrated-wiki-markup" ac:schema-version="1" ac:macro-id="188a7291-0464-4de0-9fab-4a31a6e68a79"><ac:plain-text-body><![CDATA[ Name = _names[_rnd.Next() % _names.Length];
]]></ac:plain-text-body></ac:structured-macro>
<ac:structured-macro ac:name="unmigrated-wiki-markup" ac:schema-version="1" ac:macro-id="8a8dd1ce-6551-4ff1-894e-9903b13db95b"><ac:plain-text-body><![CDATA[ Line = _lines[_rnd.Next() % _lines.Length];
]]></ac:plain-text-body></ac:structured-macro>
<ac:structured-macro ac:name="unmigrated-wiki-markup" ac:schema-version="1" ac:macro-id="42324309-56c3-4df4-a943-54cdec2d3a54"><ac:plain-text-body><![CDATA[ Color = _colors[_rnd.Next() % _colors.Length];
]]></ac:plain-text-body></ac:structured-macro>
Price = 30 + _rnd.NextDouble() * 1000;
Cost = 3 + _rnd.NextDouble() * 300;
Discontinued = _rnd.NextDouble() < .2;
Introduced = DateTime.Today.AddDays(_rnd.Next(-600, 0)); }
public string Name { get; set; } public string Color { get; set; }public string Line { get; set; } public double Price { get; set; } public double Cost { get; set; } public DateTime Introduced { get; set; } public bool Discontinued { get; set; } }
第三步:设置ItemsSource
在最后一个步骤中,您添加了一个数据模型叫做Product。在这一步,您将使用该模型生成一个数据对象的集合,并设置该列表在C1DataGrid控件中显示。为了在C1DataGrid控件中显示一个数据对象的集合,须完成以下步骤:- 打开MainWindow.cs或MainWindow.vb。
在样板的初始化代码之后,添加以下的代码,生成一个100个随机产品对象的列表:
C#
List<Product> _products = new List<Product>(); for(int i = 0; i < 100; i++)
{
_products.Add(new Product());
}- 设置C1DataGrid 的ItemsSource 属性为该产品的集合。和之前完成的第一步中的操作一样,我们将C1DataGrid 控件命名为"ProductsDataGrid"。ProductsDataGrid.ItemsSource = _products.
ProductsDataGrid.ItemsSource = _products.
类层次结构
下表总结了在C1DataGrid中所包含的重要的类型之间的关系:
C1.WPF.DataGrid.C1DataGrid : System.Windows.Controls.Control
封装了大部分的grid功能。此组件将显示在Visual Studio的ToolBox上。
C1.WPF.DataGrid.DataGridColumn : System.Object 表示grid中的列。
C1.WPF.DataGridColumnCollection : System.Object 表示data grid中列的集合。
C1.WPF.DataGrid.DataGridColumnHeaderPresenter : System.Windows.Controls.Control 表示列头的Content控件;该控件包含排序,改变大小以及过滤元素。
C1.WPF.DataGrid.DataGridRow : System.Object 表示grid中的行。
C1.WPF.DataGridRowCollection : System.Object 行的集合。
C1.WPF.DataGrid.DataGridCell : System.Object 表示单个单元格。
在Expression Blend中创建一个C1DataGrid
为了在Expression Blend中创建一个C1DataGrid,须完成以下步骤:
- 导航到Projects窗体,并右键单击工程文件列表上的Reference文件夹。在上下文菜单中选择添加引用,找到并选中C1.WPF.DataGrid.dll程序集,之后单击打开。
该对话框将关闭,并且将引用添加到您的项目中,之后控件将在Assert库中出现。
- 在工具箱中单击Asserts按钮(双V字型图标)以打开Asserts对话框。
- 在Assert库对话框中,从位于左侧的面板上选择Controls项目,之后单击位于右侧的C1DataGrid图标。
C1DataGrid图标将出现在ToolBox上位于Asserts按钮下方的位置。
- 在UserControl的设计区单击一次以选中该控件。和在Visual Studio中的操作方式不同,在Blend中您可以按照下面的步骤直接添加WPF控件至设计器。
- 双击位于工具箱中的C1DataGrid图标即可添加控件至面板。现在C1DataGrid已经添加至您的应用程序。
- 如果您需要,可以选中该控件并在属性窗体内设置其属性,以自定义该控件。例如,设置C1DataGrid控件的
Name属性的值为"c1datagrid1",同时设置Height属性为"180",Width属性为"250"。