在这个快速入门的指导教程中,我们会按照惯例创建一个简单的"Hello World!"文档。在后续的步骤里,你需要在项目中添加Reports for WinForms的打印和预览控件,设置好预览并深入了解下预览控件所支持的一些运行时交互功能。
步骤1/4:在窗体上添加预览控件
在本步骤中,你需要在窗体上添加一个Reports for WinForms控件,并且设置好窗体来创建一个简单的"Hello World!"文
档预览。最简单的文档应该是只打印一句"Hello World!"的文档了。创建这样一份文档,需要完成如下步骤来配置窗体:
|
- 创建一个新的.NET窗体应用程序,命名为HellWorld
- 从工具箱中双击C1PrintPreviewControl ,将其添加到你的窗体上一个显示了一份范例文档且名为C1PrintPreviewControl1的打印预览控件会出现在你的窗体上。
C1PrintPreviewControl 是一个包含预览框、导航、文本搜索面板和带有预定义按钮工具栏的复合控件。此外,项目的引用中还会出现两个额外的对象:C1.C1Report.2 and C1.Win.C1Report.2.
- 双击工具栏中的C1PrintDocument 图标,将该控件添加到你的项目中。这个新组件默认情况下会被命名为
C1PrintDocument1,并且出现在窗体下方的组件托盘中。
你已经创建了一个项目,并在项目中添加了Reports for WinForms的预览控件,完成了快速入门向导教程的第一步。下一步,你将要设置窗体和控件。
步骤2/4:设置窗体和控件
现在,你已经在窗体上添加了Reports for WinForms 控件,你将要设置窗体和控件。完成如下步骤:
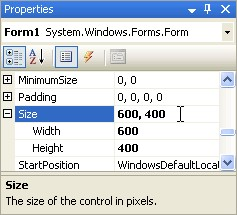
- 在Form1上右键单击后选择属性;在属性窗体中设置宽度(Size.Width)属性为600像素,高度(Size.Height)属性为400像素,用于容纳C1PrintDocument控件。
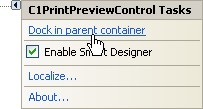
- 点击C1PrintPreviewControl1控件的智能标签,打开C1PrintPreviewControl1控件的任务菜单,选择Dock in parent container(停靠在父容器中)
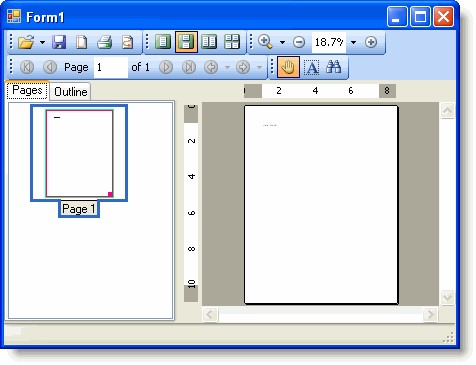
窗体设计器现在应该看起来跟下图相似:

单击选中C1PrintPreviewControl1 控件,在它的属性窗体中将文档(Document)属性设置为新添加的
C1PrintDocument1 组件(它会出现在文档属性的下拉列表中)
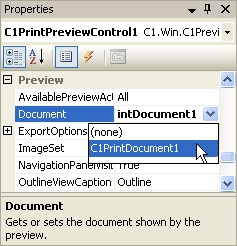
这个被选中的名为C1PrintDocument1的文档,将会在程序运行时显示在预览窗体中。
你现在已经设置好了窗体和控件,并且完成了打印和预览快速入门教程的第二步。在下一步中,你需要在项目中添加代码。
步骤3/4:在项目中添加代码
!MISSING PHRASE 'Show All'!
!MISSING PHRASE 'Hide All'!
现在,你已经在窗体上添加了Reports for WinForms控件,并且对窗体和控件进行了个性化设置。在运行项目之前,还有最后一个步骤要做。在这个步骤中,你需要在项目中通过添加代码来设置出现在该项目中的文本。
- 双击窗体的标题栏,切换到代码视图,为Form_Load事件创建对应的处理程序
- 将下方给预览文档添加显示文本的代码加入到Form_Load的事件处理程序中
Visual Basic
Visual Basic |
Me.C1PrintDocument1.Body.Children.Add(New C1.C1Preview.RenderText("Hello, |
C#
C# |
this.c1PrintDocument1.Body.Children.Add(new RenderText("Hello, World!")); |
- 将下方代码追加到Form_Load的事件处理程序中来生成文档
Visual Basic
Visual Basic |
Me.C1PrintDocument1.Generate() |
C#
C# |
this.c1PrintDocument1.Generate(); |
- 你已经将代码添加到了项目中,并且完成了打印和预览快速入门向导教程的第三步。在最后一个步骤中,你将会运行该项目。
步骤4/4:运行项目
你已经建立了窗体和Reports for WinForms控件,为控件设置了属性,同时也为项目添加了代码。接下来是运行这个项目,看一下下Reports for WinForms预览控件在运行时支持的一些交互操作。
- 运行程序,同时留意以下内容:
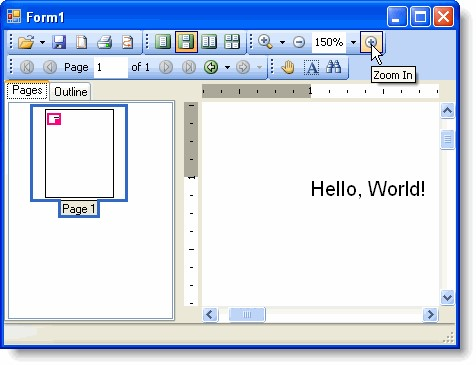
该预览会显示只有一个页面的文档,文档的左上角显示"Hello World"。
- 重复单击放大按钮,直至你能更容易的看到文档中的文本内容。
- 单击页面设置按钮,打开页面设置的对话框。在页面设置的对话框中,选择横向显示,然后单击确定,将文档的显示模式改为横向。

- 单击文本选择按钮,将文档的文本着重显示。

- 单击抓手工具按钮,在文档主体上进行拖放操作,随后文本就会出现在不同的位置

- 你可以通过点击保存或打印按钮打开别的对话框来继续尝试预览控件的其他功能。
恭喜你已经创建了一个"Hello world"文档,并完成了打印和预览快速入门的向导教程!保存你的项目,在接下来的入门教程中,你还会继续往里添加内容。制作一个简单的表格
!MISSING PHRASE 'Show All'!
!MISSING PHRASE 'Hide All'! 在文档中,表格是最有用的功能之一。表格既可以将数据以表格的形式展现出来,也可以用来为文档中其他元素提供布局。
C1PrintDocument 控件提供了全功能的表格。在本节,你会学习如何开始使用表格。我们会以C1PrintDocument 控件快速入门中创建的"Hello World"范例应用程序为基础,在其中添加一个表格。
制作简单的表格制作简单的表格:
|
- 打开你在C1PrintDocument控件快速入门教程中创建的HelloWorld应用程序(或者你也可以根据上一节的描述创建一个新的应用程序)
- 切换到代码视图,然后在Form_Load事件处理程序(如果不存在则创建一个)中添加下面的代码,将它们放在调用
Generate方法的代码之前:
Visual Basic
Visual Basic |
Dim rt As New RenderTable() |
C#
C# |
RenderTable rt = new RenderTable(); this.c1PrintDocument1.Body.Children.Add(rt); |
- 不要忘记在文档中调用Generate方法
Visual Basic
Visual Basic |
Me.C1PrintDocument1.Generate() |
C#
C# |
this.c1PrintDocument1.Generate(); |
运行程序看一下
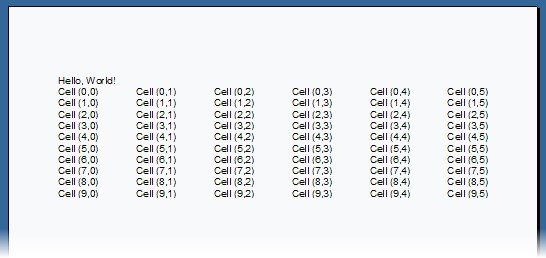
预览中显示的文档会看起来跟下图很相似
这个简单的例子展示了在C1PrintDocument控件中使用表格的几个重要方面的内容:
表格是由RenderObject类派生的RenderTable 类来表示的。
表格遵循在Microsoft Excel中使用的模型:它们的尺寸在初始化的时候是不限的,表格在渲染时的实际尺寸是由拥有最大行和列号的有值单元格所确定。在我们的例子中,由于这个表格高度是10行,宽度是6列,因此拥有最大行和列索引值的单元格的位置是在(9,5)(索引值
从0开始计数)。如果你修改代码,例如在(10,7)位置的单元格上添加文本,表格就会变成11行8列。
Visual Basic
Visual Basic |
rt.Cells(10, 7).Text = "text at row 10, column 7" |
C#
C# |
rt.Cells[10, 7].Text = "text at row 10, column 7"; |
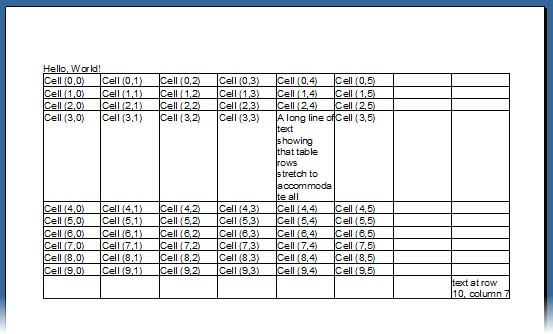
默认情况下,表格没有可见的网格线(Report for Winforms 中的网格线术语是指用于画表格的线,跟画在渲染对象周围的边框不同)。在Form Load事件处理中添加下行代码来添加网格线(用0.5 pt的钢笔线画):
Visual Basic
Visual Basic |
rt.Style.GridLines.All = LineDef.Default |
C#
C# |
rt.Style.GridLines.All = LineDef.Default; |
• 默认情况下,表格的宽度与它父级对象在客户端呈现的宽度一致(这个例子中是整个页面),并且每列的宽度等分。行的高度则是自动分配的。因此,如果你添加一行,并在其中任意一个单元格中添加一串长文本,你会发现单元格所属的行会自动向下扩展来容纳全部的文本内容。例如,在我们的例子中添加下方的代码就会生成如下图一样的表格(这个表格包含了上文描述的两个改动)
Visual Basic
Visual Basic |
rt.Cells(3, 4).Text = "A long line of text showing that table rows stretch " + "to accommodate all content." |
C#
C# |
rt.Cells[3, 4].Text = "A long line of text showing that table rows stretch " + "to accommodate all content."; |
你可以参考创建上述文档的完整form load事件处理代码:
Visual Basic
Visual Basic |
Private Sub Form1_Load(ByVal sender As System.Object, ByVal e As System.EventArgs) Handles MyBase.Load col += 1 Loop row += 1 Loop rt.Cells(3, 4).Text = "A long line of text showing that table rows " + "stretch to accommodate all content." rt.Cells(10, 7).Text = "text at row 10, column 7" rt.Style.GridLines.All = LineDef.Default Me.C1PrintDocument1.Generate() |
C#
C# |
private void Form1_Load(object sender, EventArgs e) { |
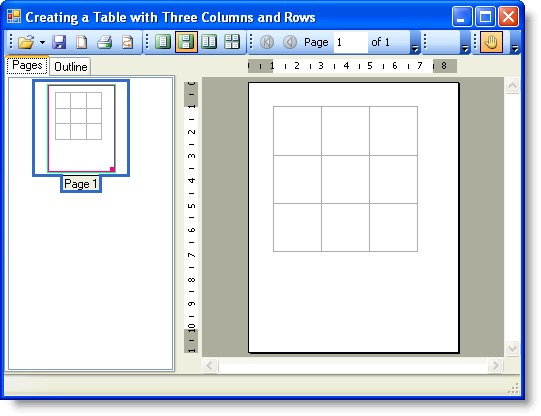
创建一个三行三列的表格
本文演示了设置一个三行三列表格的基本内容。完成如下步骤:
- 首先,创建一个能够生成和预览文档的范例的基础框架。创建一个新的.Net窗口应用程序项目。在窗体上添加一个C1PrintPreviewControl控件和一个C1PrintDocument组件。
- 设置C1PrintPreviewControl控件的Dock属性为填充(Fill)(预览控件应该是窗体上唯一的控件)。将
C1PrintPreviewControl控件的文档属性设置为如下图所示的C1PrintDocument:
这样就能使C1PrintPreviewControl控件显示C1PrintDocument了
- 双击窗体标题栏切换到代码视图,然后在源代码中创建一个Form_Load 事件处理程序
- 其次,通过将下方代码添加到Form1_Load 事件处理程序中来创建一个新的C1.C1PrintDocument.RenderTable对象,并将其赋给一个变量。
Visual Basic
Visual Basic |
Dim table As C1.C1Preview.RenderTable = New C1.C1Preview.RenderTable(Me.C1PrintDocument1) |
C#
C# |
C1.C1Preview.RenderTable table = new C1.C1Preview.RenderTable(this.c1PrintDocument1); |
- 现在,通过将下方代码追加到前一步骤的代码后面来给表格的主体(Body)添加三行三列
Visual Basic
Visual Basic |
' Add 3 rows. |
Next
Next
C#
C# |
// Add 3 rows. const int r = 3; |
此外注意,当我们直接将列添加到表格时,行也被添加到了表格主体(Body)中。这是因为RenderTable 对象总
是由三个区域组成:头部(Header),主体(Body)和尾部(Footer)。在表格中这三者都是有可能为空的。如果你只是想创建一个简单的表格,那么你可以像我们这个例子中的做法一样,直接将行添加到主体(Body)中即可。
- 添加如下代码将表格的宽和高调整为15厘米
Visual Basic
Visual Basic |
table.Height = New C1.C1Preview.Unit(15, C1.C1Preview.UnitTypeEnum.Cm) table.Width = New C1.C1Preview.Unit(15, C1.C1Preview.UnitTypeEnum.Cm) |
C#
C# |
table.Height = new C1.C1Preview.Unit(15, C1.C1Preview.UnitTypeEnum.Cm); table.Width = new C1.C1Preview.Unit(15, C1.C1Preview.UnitTypeEnum.Cm); |
- 默认情况下,表格没有边框。往表格中添加深灰色的网格线:
Visual Basic
Visual Basic |
table.Style.GridLines.All = New C1.C1Preview.LineDef(Color.DarkGray) |
C#
C# |
table.Style.GridLines.All = new C1.C1Preview.LineDef(Color.DarkGray); |
- 你创建完了一个或多个需要渲染的表格对象后,你需要将他们添加到你的文档组件对象中。首先调用文档组件对象上的Add方法,将表格添加到文档的主体(Body)上,然后调用生成(Generate)方法创建文档,代码如下:
Visual Basic
Visual Basic |
Me.C1PrintDocument1.Body.Children.Add(table) |
C#
C# |
this.c1PrintDocument1.Body.Children.Add(table); this.c1PrintDocument1.Generate(); |
运行程序看一下::
你的应用程序运行时将会看起来跟下图很相似:
向单元格添加文本
!MISSING PHRASE 'Show All'!
!MISSING PHRASE 'Hide All'!
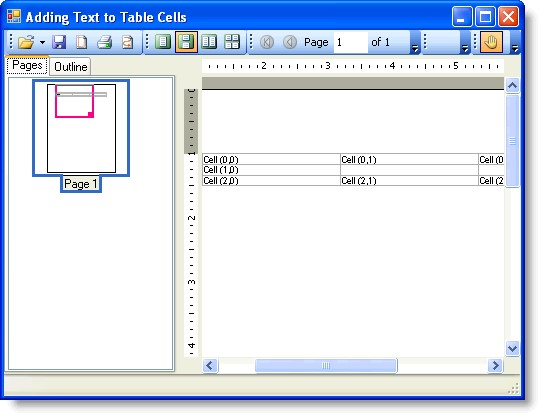
本文展示了如何使用RenderText类向表格中的特定单元格添加文本。
- 下方这段用来给表格设置深灰色网格线的代码应该已经存在于你的源代码文件中了:
Visual Basic
Visual Basic |
Private Sub Form1_Load(ByVal sender As System.Object, ByVal e As |
C#
C# |
private void Form1_Load(object sender, System.EventArgs e) { |
- 2. 通过将作为单元格显示内容的渲染对象赋给单元格的RenderObject属性可以让单元格显示各类数据。但是,由于在单元格中显示文本是一个常见任务,因此单元格还具有一个我们会用到的额外的特殊属性RenderText 。为了设置表格中每一个单元格的文本,你需要遍历表格中的每一行,然后在遍历中再嵌套一个遍历每个列的循
环。如下方所示,在嵌套循环的主体中将Text属性设置为需要的文本内容(由于这个范例的原因,我们将(1,1) 和
(1,2)单元格的值留空)
Visual Basic
Visual Basic |
' Add 3 rows. |
Dim row As Integer |
C#
C# |
// Add 3 rows. const int r = 3; |
运行程序看一下:你的表格应该看起来跟下面相似:
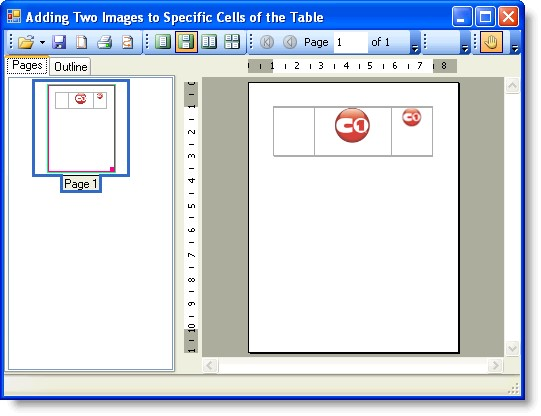
向表格的特定单元格中添加两幅图片
本文展示了如何利用RenderImage 类向当前表格的特定单元格中添加两幅不同的图片。同时也展示了在单元格中如何使用
ImageAlignHorzEnum来排列图片。注意,下面的范例使用了在"创建一个三行三列的表格"章节中创建的3x3尺寸的空表格,此外你还需要准备两幅GIF或JPEG格式的图片来完成本文中的各个步骤。完成如下步骤:
1. 如下代码应该已经存在于你的源代码文件中:
Visual Basic
Visual Basic |
Private Sub Form1_Load(ByVal sender As System.Object, ByVal e As System.EventArgs) |
Dim celltext As C1.C1Preview.RenderText = New
C1.C1Preview.RenderText(Me.C1PrintDocument1)
' Add empty cells.
celltext.Text = String.Format("", row, col) table.Cells(row, col).RenderObject = celltext Next
Next
' Generate the document.
Me.C1PrintDocument1.Body.Children.Add(table)
Me.C1PrintDocument1.Generate()
End Sub
C#
C# |
private void Form1_Load(object sender, System.EventArgs e) { |
- 在添加行的代码后追加如下代码(新的代码将会固定表格中央单元格的尺寸)
Visual Basic
Visual Basic |
' Fix the center cell's size. table.Rows(1).Height = New C1.C1Preview.Unit(5, C1.C1Preview.UnitTypeEnum.Cm) table.Cols(1).Width = New C1.C1Preview.Unit(8, C1.C1Preview.UnitTypeEnum.Cm) |
C#
C# |
// Fix the center cell's size. table.Rows[1].Height = new C1.C1Preview.Unit(5, C1.C1Preview.UnitTypeEnum.Cm); table.Cols[1].Width = new C1.C1Preview.Unit(8, C1.C1Preview.UnitTypeEnum.Cm); |
- 创建两幅新的JPEG或GIF图片,也可以使用已有图片
- 在窗体上添加两个PictureBox 控件。将他们的Image属性设置为上一步骤创建的两幅图片。此外,将这两个图片框设置为不可见(设置可见性(Visible)为False)这样窗体就不会显得凌乱(这两个控件只是用于存储图片。图片将会被渲染到C1PrintDocument对象中)
- 通过使用TableCell.CellStyle属性来修改单元格内容的基础样式。在本范例中,我们会修改单元格的ImageAlign 属性。输入如下代码来设置图像的对齐方式:
Visual Basic
Visual Basic |
' Set up image alignment. |
C#
C# |
// Set up image alignment. |
- 6. 在C1PrintDocument组件中,使用RenderImage 类来渲染显示图片(它是RenderObject的子类)。
如下所示,为两幅图片创建两个新的RenderImage 对象。
Visual Basic
Visual Basic |
Dim img1 As C1.C1Preview.RenderImage = New |
C#
C# |
C1.C1Preview.RenderImage img1 = new |
- 现在,将RenderImage对象的Image 属性指向存储在图片框(picture boxes)控件中的图片。
Visual Basic
Visual Basic |
img1.Image = Me.PictureBox1.Image img2.Image = Me.PictureBox2.Image |
C# |
img1.Image = this.pictureBox1.Image; img2.Image = this.pictureBox2.Image; |
- 将RenderImage 对象赋给单元格的RenderObject 属性,随后图片就能在单元格中被渲染显示了。
Visual Basic
Visual Basic |
table.Cells(1, 1).RenderObject = img1 table.Cells(1, 2).RenderObject = img2 |
C#
C# |
table.Cells[1, 1].RenderObject = img1; table.Cells[1, 2].RenderObject = img2; |
|
运行程序看一下
你的表格应该看起来你下面的表格相似
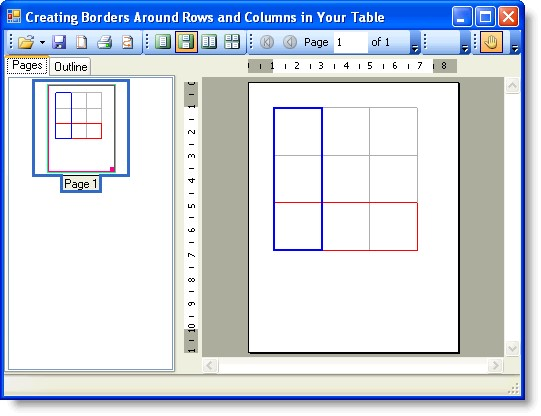
创建表格中行和列的外边框
!MISSING PHRASE 'Show All'! !MISSING PHRASE 'Hide All'!
本文展示了如何利用LineDef 类对行和列添加实线外边框。本文假设你已经有了一个三行三列的表格。
1. 在你的源代码文件中应该已经存在如下代码:
Visual Basic
Visual Basic |
Private Sub Form1_Load(ByVal sender As System.Object, ByVal e As |
' Add empty cells.
celltext.Text = String.Format("", row, col) table.Cells(row, col).RenderObject = celltext Next
Next
' Generate the document.
Me.C1PrintDocument1.Body.Children.Add(table)
Me.C1PrintDocument1.Generate()
End Sub
C#
C# |
private void Form1_Load(object sender, System.EventArgs e) { |
- 向项目中添加如下代码将你表格的宽高都设为15厘米
Visual Basic
Visual Basic |
table.Height = New C1.C1Preview.Unit(15, C1.C1Preview.UnitTypeEnum.Cm) table.Width = New C1.C1Preview.Unit(15, C1.C1Preview.UnitTypeEnum.Cm) |
C#
C# |
table.Height = new C1.C1Preview.Unit(15, C1.C1Preview.UnitTypeEnum.Cm); table.Width = new C1.C1Preview.Unit(15, C1.C1Preview.UnitTypeEnum.Cm); |
- 往项目中添加如下代码给第三行的边框属性赋上LineDef 类的一个实例对象(注意,我们利用LineDef 类的构造函数指定了新边框的颜色为红色,宽度为2pt)
Visual Basic
Visual Basic |
table.Rows(2).Style.Borders.All = New C1.C1Preview.LineDef("2pt", Color.Red) |
C#
C# |
table.Rows[2].Style.Borders.All = new C1.C1Preview.LineDef("2pt", Color.Red); |
- 如下所示,将一个LineDef 类的新实例赋给第一列的边框属性(注意,我们利用LineDef 类的构造函数指定了新边框的颜色为红色,宽度为2pt)
Visual Basic
Visual Basic |
table.Cols(0).Style.Borders.All = New C1.C1Preview.LineDef("6pt", Color.Blue) |
C#
C# |
table.Cols[0].Style.Borders.All = new C1.C1Preview.LineDef("6pt", Color.Blue); |
运行程序看一下:运行时,你的边框将会跟下面的表格相似
为表格中的特定单元格创建背景色
!MISSING PHRASE 'Show All'!
!MISSING PHRASE 'Hide All'!
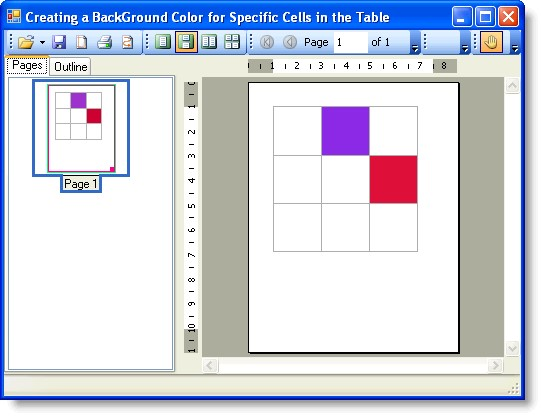
本文展示了如何为表格中的特定单元格添加背景色。同时,也展示了如何利用TableCell.CellStyle属性来设置用来渲染表格的样式。本文假设你已经有了一个三行三列的表格。
1. 在你的源代码文件中应该已经存在了如下代码
Visual Basic
Visual Basic |
Private Sub Form1_Load(ByVal sender As System.Object, ByVal e As |
C1.C1Preview.RenderText(Me.C1PrintDocument1)
' Add empty cells.
celltext.Text = String.Format("", row, col) table.Cells(row, col).RenderObject = celltext Next
Next
' Generate the document.
Me.C1PrintDocument1.Body.Children.Add(table)
Me.C1PrintDocument1.Generate()
End Sub
C#
C# |
private void Form1_Load(object sender, System.EventArgs e) { |
- 将表格的宽和高都设为15厘米
Visual Basic
Visual Basic |
table.Height = New C1.C1Preview.Unit(15, C1.C1Preview.UnitTypeEnum.Cm) table.Width = New C1.C1Preview.Unit(15, C1.C1Preview.UnitTypeEnum.Cm) |
C#
C# |
table.Width = new C1.C1Preview.Unit(15, C1.C1Preview.UnitTypeEnum.Cm); |
- 在上一步骤的代码后面追加如下代码。这些代码将会为第一行第二列的单元格添加深红色的背景色。
Visual Basic
Visual Basic |
table.Cells(1, 2).CellStyle.BackColor = Color.Crimson |
C#
C# |
table.Cells[1, 2].CellStyle.BackColor = Color.Crimson; |
|
- 为第0行第一列的单元格添加蓝紫色的背景色。输入如下代码:
Visual Basic
Visual Basic |
table.Cells(0, 1).CellStyle.BackColor = Color.BlueViolet |
C#
C# |
table.Cells[0, 1].CellStyle.BackColor = Color.BlueViolet; |
运行程序看一下:
你的表格应该看起来跟下面的表格类似:
添加文本
!MISSING PHRASE 'Show All'!
!MISSING PHRASE 'Hide All'!
下面的文章描述了如何添加段落、在表格下方添加文本、修改字体和文本的样式。
在文档中添加段落
C1PrintDocument 组件的所有内容都是由各种渲染对象来呈现的。Reports for WinForms程序集提供了多个派生于
RenderObject类的层次化的类,它们被设计用来呈现各种类型的内容,比如文本、图片等等。例如,上文中我们就利用
RenderText 类往文档中添加了一行文本。在本文中,我们会展示如何利用RenderParagraph类来创建一个文本段落(这些段落可能包含了不同样式的文本段、内联的图片和超链接)
|
用下面代码创建RenderParagraph:
Visual Basic
Visual Basic |
Dim rp As New RenderParagraph() |
C#
C# |
RenderParagraph rp = new RenderParagraph(); |
在以下情况下应该使用Paragraphs 来代替RenderText
你需要在同一个段落中显示不同样式的文本。
文本中必须要插入内联的图片(通常是像图标一样的小图片)
超链接需要被添加到部分文本上(例如,某个单词),而不是整个文本(请参阅Anchors and Hyperlinks章节)
段落的内容由各种ParagraphObject 对象构成。ParagraphObject 是一个抽象基类,它的两个派生类分别是ParagraphText 和ParagraphImage,分别用于呈现分段的文本和内联图片。你可以通过创建这两个类型的对象来填充段落中的内容,然后把它们添加到RenderParagraph.Content集合中。为了便于创建和设置这些对象,它们提供各种构造函数的重载和属性。向段落中添加超链接,可以通过指定段落对象的Hyperlink 属性为hyperlink来实现。此外,你还可以像下方示例中所示的,使用AddText, AddImage和AddHyperlink这类快捷方法的重载方法。
Visual Basic
Visual Basic |
Private Sub Form1_Load(ByVal sender As System.Object, ByVal e As System.EventArgs) |
在文档的表格下方添加文本
!MISSING PHRASE 'Show All'!
!MISSING PHRASE 'Hide All'!
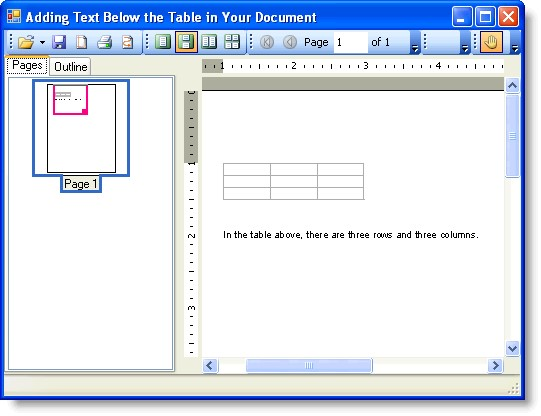
本文展示了如何利用C1.C1PrintDocument.RenderTable对象将文本渲染到块状浮动布局中。本文也展示了如何使用
Padding 属性来将块的位置上移,使得后一个渲染对象(这里指的是text)能够显示在那里。
在本文中,我们会使用Padding 属性将文本放置在距离表格下方1厘米的位置处。本文假设表格已经创建好了。
- 使用C1.C1PrintDocument.RenderTable对象来创建需要显示的文本
Visual Basic
Visual Basic |
Dim caption As C1.C1Preview.RenderText = New C1.C1Preview.RenderText(Me.C1PrintDocument1) caption.Text = "In the table above, there are three rows and three columns." |
C#
C# |
C1.C1Preview.RenderText caption = new |
- 使用Padding 属性将文本放置在表格下方1厘米处
Visual Basic
Visual Basic |
caption.Style.Padding.Top = New C1.C1Preview.Unit(1, |
C#
C# |
caption.Style.Padding.Top = new C1.C1Preview.Unit(1, |
- 使用Add方法将文本添加到表格下方。在表格的Add方法下面插入添加文本的Add方法,代码如下所示:
Visual Basic
Visual Basic |
Me.C1PrintDocument1.Body.Children.Add(table) |
C#
C# |
this.c1PrintDocument1.Body.Children.Add(table); this.c1PrintDocument1.Body.Children.Add(caption); |
|
运行程序看一下:
你的文档应该看起来跟下方的文档相似:
修改文本的字体和样式
!MISSING PHRASE 'Show All'! !MISSING PHRASE 'Hide All'!
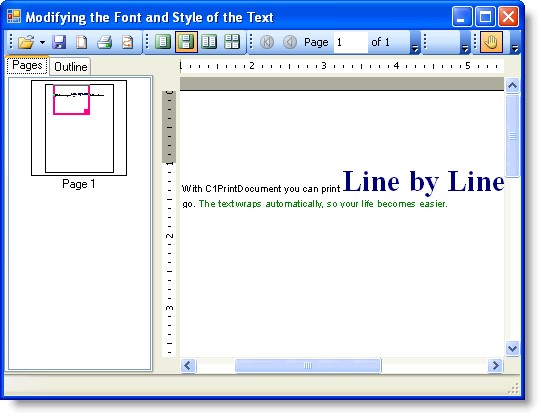
C1PrintDocument 组件包含了一个RenderInLineText 方法用于渲染指定的字符串将其放在块状流动布局中(block flow),而无需创建一个新的段落。RenderInLineText 方法会自动将文本换行。本文展示了如何使用RenderInLineText 方法。
- 创建一个新的windows窗体应用程序。在窗体上添加一个C1PrintPreview 控件。再添加一个C1PrintDocument 组件--他会显示在窗体下方的组件托盘处。预览控件的默认名称是C1PrintPreview1,文档组件则是
C1PrintDocument1。将C1PrintPreview1 控件的Document 属性设置为C1PrintDocument1,随后程序运行时预览控件就会显示文档的内容。
- 双击窗体创建一个Form_Load 事件的处理程序--下面所有的代码都是写在这里面。
- 先调用文档对象的StartDoc 方法,然后用默认的字体创建一行文本。例如:
Visual Basic
Visual Basic |
Me.C1PrintDocument1.StartDoc() |
C#
C# |
this.c1PrintDocument1.StartDoc(); |
- 接下来将代码改为显示不同的字体和颜色,然后再改回到默认字体和颜色:
Visual Basic
Visual Basic |
Me.C1PrintDocument1.RenderInlineText("Line by Line", New Font("Times New Roman", |
C#
C# |
this.c1PrintDocument1.RenderInlineText("Line by Line", new Font("Times New Roman", 30, FontStyle.Bold), Color.FromArgb(0, 0, 125)); this.c1PrintDocument1.RenderInlineText(" and modify text attributes as you go."); |
- 将这行文字的最后几个单词改为绿色
Visual Basic
Visual Basic |
Me.C1PrintDocument1.RenderInlineText(" The text wraps automatically, so your life becomes easier.", Color.Green) |
C#
C# |
this.c1PrintDocument1.RenderInlineText(" The text wraps automatically, so your life becomes easier.", Color.Green); |
- 最后调用EndDoc 方法
Visual Basic
Visual Basic |
Me.C1PrintDocument1.EndDoc() |
C#
C# |
this.c1PrintDocument1.EndDoc(); |
运行程序看一下:
你的文本应该看起来和下图中的文本相似: