报表字段的内容横跨多行或是一行都不占是很常见的事情。某些情况下,你也许希望允许字段扩充或者缩短来适应其内容,总好过在报表中切割多出的长度或是剩下白色空白。
想要完成该功能,在C1ReportDesigner的设计模式下,设置Field对象的CanGrow和CanShrink属性为True。
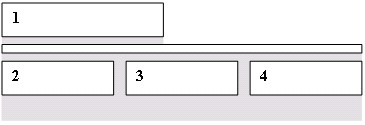
字段区域扩充时可以将处于下方的字段内容下推。同样的,收缩时也可以将处于下方的字段内容上移。这里的下方是严格意义上的下方,就像下面对话框中显示的那样:

随着字段1的扩充或是收缩,字段2,3将进行上移或是下移。字段4不受影响,因为它并不处于字段1的下方。上图中的阴影区域显示的是受字段1影响的区域。
如果你想要字段4和字段2,3保持一致,你需要添加一个格外的字段横跨字段2和字段3的上方。字段1将推动新字段,从而推动字段2,3,4。下面的对话框显示这种新布局:
|
创建装订线边距
装订线边距是一个额外区域,主要添加在装订线边缘位置。它使页面装订成文件或是小册子等操作变得简单。
想要在报表中增加一个装订线边距,你需要提高奇数页MarginLeft的属性值,然后在偶数页使用缺省数值。你可以通过脚本实现该操作。想要添加一个脚本改变呈现中页面的装订线边距,你需要完成以下步骤:
- 打开C1ReportDesigner。
- 创建一个报表或者打开已有报表,在C1ReprotDesigner中打开报表之后,你就可以修改它了。
- 单击Close Print Preview按钮,开始编辑报表。
- 在设计模式下,从属性窗口上方的下拉列表中选择Detail选项。
- 找到Detail.OnPrint属性,单击旁边空白字段,然后单击ellipsis按钮。
- 在弹出的VBScript编辑器中,输入下述VB表达式:
' VBScript: Report.OnOpen gutter = report.layout.marginleft ' initialize variable
' VBScript: Report.OnPage report.layout.marginleft = _
Iif(page mod 2 = 1, gutter, gutter - 1440)
|
定义和使用全局变量报表中定义和使用全局变量并没有特殊的方式,但是你可以添加隐藏字段到报表中,然后使用它们的值作为全局参数。完成以下步骤,实现该功能:
- 打开C1ReportDesigner。
- 创建一个报表或者打开已有报表,在C1ReprotDesigner中打开报表之后,你就可以修改它了。
- 单击Close Print Preview按钮,开始编辑报表。
- 在Design选项卡中的Fields分组中,单击Add Label按钮,增加一个字段到报表中。
- 在报表中,单击你想要放置字段的位置,然后拖拽使其适应字段内容。
- 为字段选择以下属性:
Field.Name = linesPerPage
Field.Text = 14
Field.Visible = False
- 可以使用脚本来控制每个页面中Detail行的数量。在属性窗口上方的下拉列表中选择Detail选项。
- 找到OnPrint属性,然后单击旁边空白字段,单击ellipsis按钮。VB脚本编辑器将会弹出。
- 在脚本代码编辑器中输入下面的VB表达式:
cnt = cnt + 1 detail.forcepagebreak = "none" if cnt >= linesPerPage then cnt = 0 detail.forcepagebreak = "after" endif
需要注意的是,通过修改字段的Text属性,你可以在报表呈现前设置linesPerPage字段的值。
|
指定自定义页面大小
缺省情况下,C1Report 使用默认打印机中默认页面大小创建报表。
你可以使用 PaperSize和Orientation属性来指定页面大小和方向。然而, C1Report在呈现前将会检查选中页面大小是否符合当前打印机规定。如果选中页面无效,则将页面参数改为缺省参数。
如果你想要指定一个具体页面的大小,不管是否符合打印机规定,你可以将PaperSize属性设置为Custom,然后将
CustomWidth和CustomHeight 属性设置为实际页面的规模(以像素为单位)。
使用C1ReportDesigner指定定制页面大小为25x11:
- 打开C1ReportDesigner。
- 创建一个报表或者打开已有报表,在C1ReprotDesigner中打开报表之后,你就可以修改它了。
- 单击Close Print Preview按钮,开始编辑报表。
- 在设计模式下,从属性窗口上方的下拉列表中选择Detail选项。
- 找到Layout选项,然后张开属性节点访问所有的可用属性。
- 将CustomHeight属性设置为25或是25in。
注意,尺寸将自动转换成像素单位。属性窗口将尺寸显示为36000(以像素为单位)。
- 将CustomWidth属性设置为11或是11in.
属性窗口将尺寸显示为15840(以像素为单位)。
- 将PaperSize属性设置为Custom。
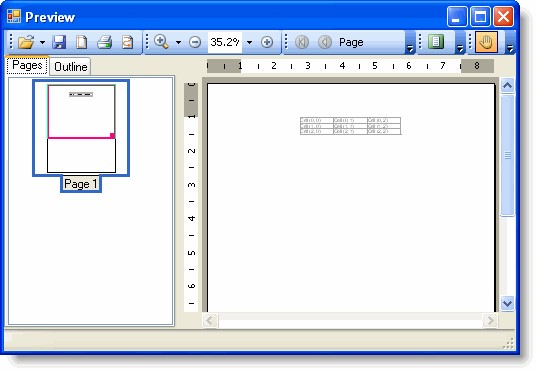
使用代码指定定制页面大小为25x11:
不管打印机页面大小的设置,下面的代码会将报表页面大小设置为25x11:
!MISSING PHRASE 'Show All'!
!MISSING PHRASE 'Hide All'!
Visual Basic
Visual Basic |
c1r.Layout.PaperSize = PaperKind.Custom c1r.Layout.CustomHeight = 25 * 1440 ' in twips c1r.Layout.CustomWidth = 11 * 1440 |
C#
C# |
c1r.Layout.PaperSize = PaperKind.Custom; c1r.Layout.CustomHeight = 25 * 1440; // in twips c1r.Layout.CustomWidth = 11 * 1440; |
|
格式化报表
下面的内容主要介绍在报表中如何应用格式化。很简单,你可以修改属性窗口中的属性或是在VB脚本表达式中增加几行脚本就能够修改你的报表。
增加交替变换的背景色
在报表中增加交替变换的背景色,你可以使用Detail区域的OnPrint属性来改变这一区域的BackColor属性实现这一功能。完成以下步骤实现该功能:
- 打开C1ReportDesigner。
- 创建一个报表或者打开已有报表,在C1ReprotDesigner中打开报表之后,你就可以修改它了。
- 单击Close Print Preview按钮,开始编辑报表。
- 在设计模式下,从属性窗口上方的下拉列表中选择Detail选项。
- 找到OnOpen属性,输入cnt = 0。这里是初始化cnt变量。
- 下一步,在属性窗口上方的下拉列表中选择Detail选项。
- 找到OnPrint属性,单击旁边的空白字段,然后单击ellipsis按钮。
- 弹出VB脚本编辑器,然后在代码编辑框中输入下方的VB脚本表达式:
cnt = cnt + 1 if cnt mod 2 = 0 then detail.backcolor = rgb(200,220,200) else
detail.backcolor = rgb(255,255,255) endif
- 单击Preview按钮,预览交替变换背景色的报表效果。
实现效果如下图所示:下面的报表实现了交替变换的背景色。

当Detail区域被呈现时,计数器随之增加,BackColor属性将会自动切换。
|
增加条件格式化
在某些情况下,你也许想要根据字段内容改变一个字段的显示效果。例如,你也许想要让仓库中贵重的物品或是便宜的物品高亮显示。下面的脚本可以实现这一功能。
完成以下步骤,实现该功能:
- 打开C1ReportDesigner。
- 创建一个报表或者打开已有报表,在C1ReprotDesigner中打开报表之后,你就可以修改它了。
- 单击Close Print Preview按钮,开始编辑报表。
- 在设计模式下,从属性窗口上方的下拉列表中选择Detail选项(因为该区域包含想要添加格式化条件的字段)。
- 找到OnFormat 属性,单击旁边的空白字段,然后单击ellipsis按钮。
- VB脚本编辑框将会弹出,在代码编辑框中输入下述VB脚本表达式:
' VBScript: Detail.OnFormat
If UnitsInStock + UnitsOnOrder < ReorderLevel And _
Discontinued = False Then Detail.BackColor = rgb(255,190,190)
Else
Detail.BackColor = vbWhite
Endif 脚本将会根据UnitsInStock, UnitsOnOrder, ReorderLevel和Discontinued的值改变Detail区域BackColor属性。
|
根据字段值编辑字段格式
你可以通过为Detail区域的OnFormat属性指定一个表达式来实现根据字段值改变报表中字段格式的功能。想要为OnFormat属性指定表达式,你需要完成以下步骤:
- 打开C1ReportDesigner。
- 创建一个报表或者打开已有报表,在C1ReprotDesigner中打开报表之后,你就可以修改它了。
- 单击Close Print Preview按钮,开始编辑报表。
- 在设计模式下,从属性窗口的下拉列表中选择Detail选项,从而查看Detail区域所有可用属性。
- 找到OnFormat属性,然后单击属性旁边的ellipsis按钮。
- VB脚本编辑框将会弹出,你可以在此指定一个表达式。
如果UnitsInStock和UnitsOnOrder数值总和小于ReorderLevel的值,下面的表达式将改变UnitsInStock字段的前景色为红
色。下面有几种书写表达式的方式:
选择选择1:
UnitsInStockCtl.Forecolor = Iif(UnitsInStock + UnitsOnOrder < ReorderLevel, vbRed, vbBlack) 选择选择2:
lowStock = UnitsInStock + UnitsOnOrder < ReorderLevel UnitsInStockCtl.Forecolor = Iif(lowStock, vbRed, vbBlack)
选择选择3:
If UnitsInStock + UnitsOnOrder < ReorderLevel Then
UnitsInStockCtl.Forecolor = vbRed
Else
UnitsInStockCtl.Forecolor = vbBlack
End If
选择选择4:
color = Iif(UnitsInStock + UnitsOnOrder < ReorderLevel, vbred, vbblack) UnitsInStockCtl.Forecolor = color 实现效果如下所示:实现效果如下所示:注意,因为UnitsInStock和UnitsOnOrder的总和小于ReorderLevel,Outback Lager的UnitsInStock数值变为红色:

禁止或强制全零数组的显示
你可以将字段的Format 属性设置为#,从而禁止显示数值为0的字段。#号是一个格式标识,用于指定仅显示有效数值(前面或者后面不加零)。
使用例如"0000"这样的格式,来强制显示某一具体数值。这里的零将强制显示数据,无论前面还是后面添加零。
每一种格式字符串都通过分号分割成三部分。如果尝试使用两部分,第一部分用于正值和0,第二部分用于负值。如果尝试使用三部分,第一部分用于正值,第二部分用于负值,第三部分用于0。例如,"#;(#);ZERO"。
|
加载报表模板
C1Report 使用行数据组合报表模板来完成创建报表的工作。为了创建报表,你需要加载报表模板到C1Report中。下面将介绍几种加载报表模板的方式。
从文件中加载报表模板
!MISSING PHRASE 'Show All'!
!MISSING PHRASE 'Hide All'!
你可以使用C1ReportDesigner来加载报表模板文件(XML文件中将包含一个或者多个报表模板)。
在设计阶段从文件中加载报表模板:
设计阶段从文件中加载报表模板,你需要完成下述任务中的一种:
右键单击C1Report组件,选择Load Report菜单选项 或者
单击C1Report组件上的smart标签,然后从C1Report任务菜单中选择Load Report选项。
在Select a report对话框中选择你想要加载的报表,完成以下任务:
- 单击ellipsis按钮,Open对话框弹出,你可以选择XML文件。
- 可用报表模板将在Report的下拉列表中显示。选择一个报表模板进行加载。
- 单击Load按钮,然后单击OK按钮关闭对话框。
报表选择对话框效果如下所示:

使用代码从文件中加载报表模板
你可以使用Load方法,从文件中加载报表模板。将你希望加载报表的报表模板文件名称和报表名称作为参数。如果你想要罗列报表模板中的报表,可以使用GetReportInfo方法。它将以列表的形式返回文件中所有报表。
Visual Basic
Visual Basic |
'获取报表模板文件中的报表列表 |
C#
C# | |
//获取报表模板文件中的报表列表 | ]]></ac:plain-text-body></ac:structured-macro> |
通过字符串加载报表模板:
!MISSING PHRASE 'Show All'!
!MISSING PHRASE 'Hide All'!
C1Report有一个ReportDefinition属性,该属性允许你以字符串的形式获取或者设置完整报表模板。这是一种非常方便的实现方式,你可以在数据库或者自身应用的数据结构中对报表模板进行存储和检索。
ReportDefinition字符串中包含了一个完整的XML,并且存储在报表模板文件中。举例说明如下:
Visual Basic
Visual Basic |
' 把报表加载到C1Report组件 |
C#
C# |
// 把报表加载到C1Report组件 |
修改子报表
本部分主要介绍如何修改子报表。子报表是指正式报表中包含了另外一个报表的字段。主报表经常设计用于作为显示主报表中详细信息的主要场景。
子报表中增加页眉
C1Report在子报表中不显示页眉和页脚。它仅在主报表中使用。在Microsoft Access中同样如此。
在多数情况下,你可能想要在子报表中页面分页中包含页眉信息。想要实现该功能,你需要将页眉放入分组页面区域,并且设置区域的Repeat 属性为True。如果你的子报表并不包含分组,请添加一个空白分组。
|
在子报表中检索数据
在某些情况下,你想要将子报表中的数据传递给主报表。脚本变量并不能实现该功能,因为每个报表都有自己的脚本作用域(这将避免变量名冲突的可能)。
想要将子报表中的数据传递给主报表,你必须将值存储在子报表字段中或者在子报表的Tag属性中,然后让主报表阅读这些值。在这个例子中,子报表计算出了每个商品类别的平均价格,然后将其存储在Tag属性中。主报表检索并显示这个值。
|
呈现报表(预览,打印以及导出)
一旦报表模板加载到组件中,并且完成数据源的定义,你就可以将报表呈现到打印机,预览控制器或者是导出成报表文件。
在报表呈现过程中显示进度显示器
!MISSING PHRASE 'Show All'!
!MISSING PHRASE 'Hide All'!
大多数预览应用在呈现页面时都包含进度提示,并且拥有一个按钮允许你取消报表生成。.NET打印预览控制器自动提供这一功能。如果你直接打印报表或者导出报表文件,这里并没有内置的进度显示在报表UI中。
你可以使用C1Report 事件创建一个报表进度对话框,或者在呈现报表时更新状态条。StartPage和EndReport事件将会有足够的反馈告诉你哪个页面正在被打印以及报表什么时候完成。例如,下述代码使用起始页事件给状态条
(StatusStrip1)提供反馈。
Visual Basic
Visual Basic |
Private Sub c1r_StartPage(ByVal sender As System.Object, ByVal e As |
C#
C# |
private void c1r_StartPage(object sender, ReportEventArgs e) { statusStrip1.Text = string.Format("Rendering page {0} of '{1}'...", c1r.Page, c1r.ReportName); |
想要在报表完成之前取消动作,增加一个取消按钮到你的应用中,然后使用它来设置C1Report的Cancel属性为True。例如:
Visual Basic
Visual Basic |
Private Sub _btnCancel_Click(ByVal sender As System.Object, ByVal e As System.EventArgs) Handles btnCancel.Click c1r.Cancel = True Close() |
C#
C# |
private void _btnCancel_Click(object sender, System.EventArgs e) { |
需要注意的是你也许还想要提供进度条以及当前是第几页的提示,但是这通常情况下很难去实现。因为页面计数器在报表呈现完成前并不知道当前正在呈现的页数。
|
预览报表
!MISSING PHRASE 'Show All'! !MISSING PHRASE 'Hide All'!
想要预览报表,可以使用C1Report.Document 属性。在Report for WinForms预览控制器中或者在.NET打印预览或者打印预览对话框控制器中设置Document属性。预览控制器将显示该报表,并且允许用户区浏览,缩放或者打印报表。例如:
Visual Basic
Visual Basic |
' 加载报表模板 |
C#
C# |
// 加载报表模板 |
|
打印报表
!MISSING PHRASE 'Show All'! !MISSING PHRASE 'Hide All'! 你可以使用C1Report.Document属性来直接打印报表。这一属性返回一个标准PrintDocument对象,该对象拥有一个
Print方法以及公开的打印机和页面设置。
例如,下述代码显示一个打印对话框,然后打印报表:
Visual Basic
Visual Basic |
' 加载报表模板 |
C#
C# |
// 加载报表模板 |
导出报表
!MISSING PHRASE 'Show All'!
!MISSING PHRASE 'Hide All'!
按常用文件格式导出报表
C1Report有一个RenderToFile 方法,允许你按照几种不同的文件格式导出报表,其中包含HTML, RTF, PDF, TIFF, Text, 和XLS等等。例如,下述代码创建一个PDF和XLS版本的报表:
Visual Basic
Visual Basic |
' 加载报表模板 |
C#
C# |
// 加载报表模板 |
|
按自定义格式导出报表
如果C1Report并不支持你想要导出的报表格式,你可以自己编写导出过滤器类,使用C1Report.RenderToFilter 方法将报表呈现到自定义的过滤器中。
自定义过滤器类继承于C1.Win.C1Report.ExportFilter类。通过重载少部分简单方法,例如:StartReport, StartSection,
RenderField, EndSection,和EndReport.来实现该功能。
写一个自定义导出过滤器并不困难。例如,它可以用于创建自定义XML格式的报表,以用于其他应用的后续处理。
保存报表模板
当你在C1ReportDesigner应用中完成创建和浏览报表,选择Application按钮然后选择Save选项能够保存你的报表模板文件。Designer将按照XML格式保存报表模板,该格式可以在Designer中阅读或者直接导入到C1Report组件中。
打印及预览基于任务的帮助基于任务的帮助假定您已经熟悉了在VisualStudio.NET平台上的编程。通过以下各个帮助概述的步骤,您将可以创建演示了Reportsfor WinForms预览的各种功能的工程,并充分了解ComponentOneReportsfor WinForms能够做什么。如果您之前完全没有接触过Reportsfor WinForms,您可能需要首先学习C1PrintDocumentQuick Start以便更快的熟悉这个产品。
基于任务的帮助主题创建一个新的.NET工程,并向窗体放置一个C1PrintDocument和一个C1PrintPreview组件,同时设置C1PrintPreviewControl1的Document属性为C1PrintDocument1。同样您需要引用以下命名空间至您的工程:
C1.Win.C1Preview
C1.C1Preview
设置文档信息
!MISSING PHRASE 'Show All'! !MISSING PHRASE 'Hide All'!
为设置文档信息,通过设计器或者代码输入Author, Comment, Company, CreationTime, Creator, Keywords, Manager, Operator, Producer, RevisionTime, Subject,以及Title 属性的值。
在设计器中在设计器中
- 在C1PrintDocument 属性窗体,找到DocumentInfo属性并展开属性节点。

输入各个属性的值,并在结束设置属性之后按下ENTER键
注意:注意:有些属性具有内建的编辑器,帮助您设置属性,比如说:
单击Keywords属性紧挨的省略号 按钮,打开字符串集合编辑器,可以为文档输入多个关键字。
单击CreationTime或者RevisionTime属性旁边的下拉箭头按钮,允许您选择一个日期。Creator属性的默认值是 ComponentOne Document Engine。。通过代码
应当添加以下代码至Form_Load 事件。为设置Author属性,请添加以下代码:
Visual BasicVisual Basic
Me.C1PrintDocument1.DocumentInfo.Author = "Jane Doe"
C#
C#
this.c1PrintDocument1.DocumentInfo.Author = "Jane Doe";
为设置Comment属性,请添加以下代码:
Visual BasicVisual Basic
Me.C1PrintDocument1.DocumentInfo.Comment = "This is a C1PrintDocument file."
C#
C#
this.c1PrintDocument1.DocumentInfo.Comment = "This is a C1PrintDocument file.";
为设置Company属性,请添加以下代码:
Visual BasicVisual Basic
Me.C1PrintDocument1.DocumentInfo.Company = "ComponentOne"
C#
C#
this.c1PrintDocument1.DocumentInfo.Company = "ComponentOne";
为设置CreationTime属性,请添加以下代码:
Visual BasicVisual Basic
Me.C1PrintDocument1.DocumentInfo.CreationTime = "2/29/08"
C#
C#
this.c1PrintDocument1.DocumentInfo.CreationTime = "2/29/08";
为设置Creator属性,请添加以下代码。默认值是ComponentOneDocumentEngine。
Visual BasicVisual Basic
Me.C1PrintDocument1.DocumentInfo.Creator = "C1PrintPreview"
C#
C#
this.c1PrintDocument1.DocumentInfo.Creator = "C1PrintPreview";
为设置Keywords属性,请添加以下代码。Keywords应当由空格分隔。
Visual BasicVisual Basic
Me.C1PrintDocument1.DocumentInfo.Keywords = New String() {"C1PrintPreview
ComponentOne C1PrintDocument"}C#
C#
this.c1PrintDocument1.DocumentInfo.Keywords = new string() {"C1PrintPreview
ComponentOne C1PrintDocument"};为设置Manager属性,请添加以下代码:
Visual BasicVisual Basic
Me.C1PrintDocument1.DocumentInfo.Manager = "John Smith"
C#
C#
this.c1PrintDocument1.DocumentInfo.Manager = "John Smith";
为设置Operator属性,请添加以下代码:
Visual BasicVisual Basic
Me.C1PrintDocument1.DocumentInfo.Operator = "Joe Brown"
C#
C#
this.c1PrintDocument1.DocumentInfo.Operator = "Joe Brown";
为设置Producer属性,请添加以下代码:
Visual BasicVisual Basic
Me.C1PrintDocument1.DocumentInfo.Producer = "ComponentOne Preview for .NET"
C#
C#
this.c1PrintDocument1.DocumentInfo.Producer = "ComponentOne Preview for .NET";
为设置RevisionTime属性,请添加以下代码:
Visual BasicVisual Basic
Me.C1PrintDocument1.DocumentInfo.RevisionTime = "2/29/08"
C#
C#
this.c1PrintDocument1.DocumentInfo.RevisionTime = "2/29/08";
为设置Subject属性,请添加以下代码:
Visual BasicVisual Basic
Me.C1PrintDocument1.DocumentInfo.Subject = "Document Creation"
C#
C#
this.c1PrintDocument1.DocumentInfo.Subject = "Document Creation";
为设置Title属性,请添加以下代码:
Visual BasicVisual Basic
Me.C1PrintDocument1.DocumentInfo.Title = "Creating Documents with C1PrintPreview"
C#
C#
this.c1PrintDocument1.DocumentInfo.Title = "Creating Documents with C1PrintPreview";
隐藏导航面板
为了隐藏导航面板,需要设置NavigationPanelVisible属性为False。这可以通过设计器或者代码做到。在智能设计器中
- 打开MainMenu浮动工具栏。
- 选择Layout按钮以打开Layout对话框。
- 取消对Navigationpanel选项的选中状态,可以设置NavigationPanelVisible属性的值为False。

通过属性窗体通过属性窗体
- 选中C1PrintPreviewControl并导航至属性窗口。
- 设置NavigationPanelVisible属性的值为False。

通过代码
添加以下代码至Form_Load事件:
Visual Basic
Visual Basic |
Me.C1PrintPreviewControl1.NavigationPanelVisible = False |
C#
C# |
this.c1PrintPreviewControl1.NavigationPanelVisible = false; |
您所达到的效果
导航面板将不可见:

向大纲视图标签页添加大纲视图条目
!MISSING PHRASE 'Show All'! !MISSING PHRASE 'Hide All'!
为了向大纲视图标签页添加大纲视图条目,我们需要用到OutlineNodeCollection.Add方法。
- 从工具栏添加C1PrintPreviewControl以及C1PrintDocument控件到您的工程。
单击C1PrintPreviewControl1选中显示在属性窗体上,设置其Document属性为C1PrintDocument1。
- 添加以下代码至Form_Load事件:
Visual Basic
Visual Basic |
' 构建文档. |
C#
C# |
// 构建文档. |
// 生成文档.
this.c1PrintDocument1.Generate();
- 添加MakeDoc子程序,该程序通过OutlineNodeCollection.Add方法添加大纲视图条目至大纲视图标签页:
Visual Basic
Visual Basic |
Private Sub MakeDoc() |
C#
C# |
private void MakeDoc() { |
// 为RenderText2添加一个大纲视图条目。
this.c1PrintDocument1.Outlines.Add("RenderText2", rt2);
// 将RenderText对象添加至文档。
this.c1PrintDocument1.Body.Children.Add(rt1); this.c1PrintDocument1.Body.Children.Add(rt2); }
您所达到的效果
向大纲视图标签页添加了两个大纲视图条目"RenderText1"以及"RenderText2":

向页面添加分栏
!MISSING PHRASE 'Show All'! !MISSING PHRASE 'Hide All'!
通过Add方法添加分栏至一个页面。
- 导航至工具栏,向工程添加C1PrintPreviewControl以及C1PrintDocument控件。
- 单击C1PrintPreviewControl1 选中至属性窗口,并设置其Document属性的值为C1PrintDocument1。
- 添加以下代码至Form_Load事件:
Visual Basic
Visual Basic |
// 构建文档 |
MakeDoc();
// 生成文档。
this.c1PrintDocument1.Generate();
C#
C# |
' 构建文档 |
- 添加MakeDoc子方法,该方法通过Add方法向文档的每一页添加分栏:
To write code in Visual Basic
Visual Basic |
Private Sub MakeDoc() |
the house that Jack built."
' 添加分列符
rt2.BreakAfter = C1.C1Preview.BreakEnum.Column
' 创建RenderText2。
Dim rt3 As New C1.C1Preview.RenderText rt3.Text = "This is the priest all shaven and shorn, that married the man all tattered and torn, that kissed the maiden all forlorn, that milked the cow with the crumbled horn, that tossed the dog, that worried the cat, that chased the rat, that ate the carrot, that lay in the house that Jack built. This is the cock that crowed in the morn, that waked the priest all shaven and shorn, that married the man all tattered and torn, that kissed the maiden all forlorn, that milked the cow with the crumbled horn, that tossed the dog, that worried the cat, that chased the rat, that ate the carrot, that lay in the house that Jack built. This is the farmer sowing the corn, that kept the cock that crowed in the morn, that waked the priest all shaven and shorn, that married the man all tattered and torn, that kissed the maiden all forlorn, that milked the cow with the crumbled horn, that tossed the dog, that worried the cat, that chased the rat, that ate the carrot, that lay in the house that Jack built."
' 将RenderText对象添加至文档。
Me.C1PrintDocument1.Body.Children.Add(rt1)
Me.C1PrintDocument1.Body.Children.Add(rt2)
Me.C1PrintDocument1.Body.Children.Add(rt3)
End Sub
To write code in C#
C# |
public void MakeDoc() { |
// 创建RenderText2。
C1.C1Preview.RenderText rt2 = new C1.C1Preview.RenderText(); rt2.Text = "This is the dog that worried the cat, that chased the rat, that ate the carrot, that lay in the house that Jack built. This is the cow with the crumbled horn, that tossed the dog, that worried the cat, that chased the rat, that ate the carrot, that lay in the house that Jack built. This is the maiden all forlorn, that milked the cow with the crumbled horn, that tossed the dog, that worried the cat, that chased the rat, that ate the carrot, that lay in the house that Jack built. This is the man all tattered and torn, that kissed the maiden all forlorn, that milked the cow with the crumbled horn, that tossed the dog, that worried the cat, that chased the rat, that ate the carrot, that lay in the house that Jack built.";
// 添加分列符
rt2.BreakAfter = C1.C1Preview.BreakEnum.Column;
// 创建RenderText3。
C1.C1Preview.RenderText rt3 = new C1.C1Preview.RenderText(); rt3.Text = "This is the priest all shaven and shorn, that married the man all tattered and torn, that kissed the maiden all forlorn, that milked the cow with the crumbled horn, that tossed the dog, that worried the cat, that chased the rat, that ate the carrot, that lay in the house that Jack built. This is the cock that crowed in the morn, that waked the priest all shaven and shorn, that married the man all tattered and torn, that kissed the maiden all forlorn, that milked the cow with the crumbled horn, that tossed the dog, that worried the cat, that chased the rat, that ate the carrot, that lay in the house that Jack built. This is the farmer sowing the corn, that kept the cock that crowed in the morn, that waked the priest all shaven and shorn, that married the man all tattered and torn, that kissed the maiden all forlorn, that milked the cow with the crumbled horn, that tossed the dog, that worried the cat, that chased the rat, that ate the carrot, that lay in the house that Jack built.";
// 将RenderText对象添加至文档。
this.c1PrintDocument1.Body.Children.Add(rt1); this.c1PrintDocument1.Body.Children.Add(rt2); this.c1PrintDocument1.Body.Children.Add(rt3); }
所达到的效果
在文档的每一列,文档分栏显示为两列:

自定义另存为对话框的文件格式
!MISSING PHRASE 'Show All'! !MISSING PHRASE 'Hide All'!
为了自定义另存为对话框的文件格式仅支持特定的文件格式(例如,Adobe PDF格式),则除了PDF以外的其它文件格式必须通过ExportOptions属性禁用。
为了保存成Adobe PDF(.pdf)以外的文件格式,请替换以下代码中的"PdfExportProvider"为下表中的选项之一:
文件格式 | Export Provider |
BMP Image (.bmp) | BmpExportProvider |
C1 Document (.c1d) | C1dExportProvider |
Enhanced Metafile (.emf) | EmfExportProvider |
GIF Image (.gif) | GifExportProvider |
HTML (.htm) | HtmlExportProvider |
JPEG Image (.jpg) | JpegExportProvider |
Microsoft Excel (.xls) | XlsExportProvider |
Open XML MS Excel File (.xlsx) | XslsExportProvider |
PNG Image (.png) | PngExportProvider |
Rich Text Format (.rtf) | RtfExportProvider |
TIFF Image (.tiff) | TiffExportProvider |
添加以下代码至Form_Load事件:
Visual Basic
Visual Basic |
Dim lp As Integer = 0 |
C#
C# |
for (int lp = 0; lp < c1PrintPreviewControl1.ExportOptions.Count; lp++) { |
您所达到的效果在另存为对话框中唯一可用的格式是Adobe PDF:

以指定角度绘制文本
!MISSING PHRASE 'Show All'! !MISSING PHRASE 'Hide All'!
为了以任意角度绘制文本,需要使用到Graphics对象,同时我们要创建一个子方法旋转文本。
- 导航至工具栏并添加C1PrintPreviewControl以及C1PrintDocument控件至工程。
- 单击C1PrintPreviewControl1以选中至属性窗体,并设置其Document属性为C1PrintDocument1。
- 添加以下代码至Form_Load事件:
Visual Basic
Visual Basic |
Me.C1PrintDocument1.StartDoc() |
C#
C# |
this.c1PrintDocument1.StartDoc(); this.c1PrintDocument1.RenderBlockGraphicsBegin(); |
- 添加以下RotateText子方法,以某个角度绘制文本:
Visual Basic
Visual Basic |
Public Sub RotateText(ByVal g As Graphics, ByVal f As Font, ByVal s As String, |
C#
C# |
public void RotateText(Graphics g, Font f, string s, Single angle, Brush b, Single x, Single y) { if (angle > 360) |
while (angle > 360) { angle = angle - 360; } } else if (angle < 0) { |
所达到的效果您所添加的文本显示为45度角:

格式化表格
以下基于任务的帮助主题将演示自定义表格的功能。每一个主题假设您已经学会如何创建一个表格。
改变行和列的背景色
!MISSING PHRASE 'Show All'!
!MISSING PHRASE 'Hide All'!
设置行和列的BackColor属性可以改变一个表格中行和列的背景色。
|
在Add和Generate方法调用之前,添加以下代码至Form_Load事件:
Visual Basic
Visual Basic |
' 设置列的颜色。 |
C#
C# | |
// 设置列的颜色。 | ]]></ac:plain-text-body></ac:structured-macro> |
您所达到的效果表格中的一列的背景色变为PapayaWhip同时第一行的背景色变为PaleTurquoise:

!MISSING PHRASE 'Show All'! !MISSING PHRASE 'Hide All'!
This topic shows how to change the Font in a single table cell, of a table column or of a table row.
Changing the Font in a Single Table Cell
To change the font in a single table cell, set the Font property for the cell. Add the following code to the Form_Load event before the Add and Generate methods:
To write code in Visual Basic
Visual Basic |
table.Cells(1, 1).Style.Font = New Font("Tahoma", 12, FontStyle.Bold) table.Cells(1, 1).Style.TextColor = Color.DarkGreen |
To write code in C#
C# | ||
<ac:structured-macro ac:name="unmigrated-wiki-markup" ac:schema-version="1" ac:macro-id="0cb6018c-c8cd-46e5-b77a-bf348b6112d4"><ac:plain-text-body><![CDATA[ | table.Cells[1, 1].Style.Font = new Font("Tahoma", 12, FontStyle.Bold); table.Cells[1, 1].Style.TextColor = Color.DarkGreen; | ]]></ac:plain-text-body></ac:structured-macro> |
Changing the Font of a Table Column
To change the font of a table column, set the Font property for the column. Add the following code to the Form_Load event before the Add and Generate methods:
To write code in Visual Basic
Visual Basic |
table.Cols(0).Style.Font = New Font("Arial", 12, FontStyle.Bold) |
To write code in C#
C# | ||
<ac:structured-macro ac:name="unmigrated-wiki-markup" ac:schema-version="1" ac:macro-id="f2ececf1-35f7-4f7d-8f6c-12963305b931"><ac:plain-text-body><![CDATA[ | table.Cols[0].Style.Font = new Font("Arial", 12, FontStyle.Bold); | ]]></ac:plain-text-body></ac:structured-macro> |
Changing the Font of a Table Row
To change the font of a table row, set the Font property for the row. Add the following code to the Form_Load event before the Add and Generate methods:
To write code in Visual Basic
Visual Basic |
table.Rows(0).Style.Font = New Font("Arial", 12, FontStyle.Bold) |
To write code in C#
C# | ||
<ac:structured-macro ac:name="unmigrated-wiki-markup" ac:schema-version="1" ac:macro-id="a2f7c178-780f-431a-8cc6-bb2301b2ba81"><ac:plain-text-body><![CDATA[ | table.Rows[0].Style.Font = new Font("Arial", 12, FontStyle.Bold); | ]]></ac:plain-text-body></ac:structured-macro> |
What You've Accomplished
The following image shows how the table will appear, when you change the font in a single table cell, using the code given above. The text in cell (1,1) appears in 12 point, Dark Green, Bold Tahoma font:

The following image shows how the table will appear, when you change the font of a table column, using the code given above. The text in the first column appears in 12 point, Bold Arial font:

The following image shows how the table will appear, when you change the font of a table row. The text in the first row appears in 12 point, Bold Arial font:

改变一个表格单元格的字体
!MISSING PHRASE 'Show All'! !MISSING PHRASE 'Hide All'!
设置单元格的Font属性可以改变一个表格单元格的字体。向Form_Load事件在Add以及Generate方法之前添加以下代码:
Visual Basic
Visual Basic |
table.Cols(0).Style.Font = New Font("Arial", 12, FontStyle.Bold) |
C#
C# | ||
<ac:structured-macro ac:name="unmigrated-wiki-markup" ac:schema-version="1" ac:macro-id="1b488252-f0f5-4fc3-8e9b-ef90adfec666"><ac:plain-text-body><![CDATA[ | table.Cols[0].Style.Font = new Font("Arial", 12, FontStyle.Bold); | ]]></ac:plain-text-body></ac:structured-macro> |
您所达到的效果
单元格(1,1)的文本显示为Tahoma字体,深绿色,尺寸为12point:
改变一个表格行的字体
!MISSING PHRASE 'Show All'! !MISSING PHRASE 'Hide All'!
设置列的Font属性可以改变表格行的字体。向Form_Load事件在Add以及 Generate 方法之前添加以下代码:
Visual Basic
Visual Basic |
table.Rows(0).Style.Font = New Font("Arial", 12, FontStyle.Bold) |
C#
C# | ||
<ac:structured-macro ac:name="unmigrated-wiki-markup" ac:schema-version="1" ac:macro-id="c2fa3a38-8a54-451f-b201-3e59a24bd57d"><ac:plain-text-body><![CDATA[ | table.Rows[0].Style.Font = new Font("Arial", 12, FontStyle.Bold); | ]]></ac:plain-text-body></ac:structured-macro> |
您所达到的效果
第一行中的文本显示为粗体的Arial字体,大小为12point:
改变一个表格列的字体
设置列的Font属性可以改变表格列的字体。向Form_Load事件在Add以及Generate方法之前添加以下代码:
Visual Basic
Visual Basic |
table.Cols(0).Style.Font= New Font("Arial",12, FontStyle.Bold) |
C#
C# | ||
<ac:structured-macro ac:name="unmigrated-wiki-markup" ac:schema-version="1" ac:macro-id="b3e128c1-2b90-457f-8207-7a51622781d9"><ac:plain-text-body><![CDATA[ | table.Cols[0].Style.Font= new Font("Arial",12, FontStyle.Bold); | ]]></ac:plain-text-body></ac:structured-macro> |
第一列中的文本显示为粗体的Arial字体,大小为12point:

!MISSING PHRASE 'Show All'! !MISSING PHRASE 'Hide All'!
设置表格的FlowAlign属性可以改变表格的对齐方式。例如,向Form_Load事件调用Generate 方法之前添加以下代码以便将表格在页面上居中显示:
Visual Basic
Visual Basic |
table.Style.FlowAlign = FlowAlignEnum.Center |
C#
C# |
table.Style.FlowAlign = FlowAlignEnum.Center; |
您所达到的效果
表格在页面上居中显示:

在表格中呈现重叠的对象
!MISSING PHRASE 'Show All'! !MISSING PHRASE 'Hide All'!
您可以轻易地在一个表格单元格中呈现重叠的对象。例如,向Form_Load事件调用Generate 方法之前添加以下代码以便添加一个重叠了两条交叉直线的矩形至表格:
Visual Basic
Visual Basic |
'创建一个矩形,添加两条交叉对角线。 |
C#
C#
//创建一个矩形,添加两条交叉对角线。 | ]]></ac:plain-text-body></ac:structured-macro> |
您所达到的效果
表格显示一个带有交叉线的正方形:

插入分页符
!MISSING PHRASE 'Show All'! !MISSING PHRASE 'Hide All'!
通过 RenderObject的BreakAfter插入一个分页符。
- 从工具栏上向您的工程添加C1PrintPreviewControl 和C1PrintDocument控件。
- 单击C1PrintPreviewControl1 选中至属性窗体,设置其Document属性为C1PrintDocument1。
- 添加以下代码至Form_Load事件:
Visual Basic
Visual Basic |
' 构建文档。 |
C#
C# |
// 构建文档。 |
- 添加 MakeDoc 子方法,并通过BreakAfter属性在每一个RenderObject之后插入一个分页符:
Visual Basic
Visual Basic |
Private Sub MakeDoc() |
C#
C# |
private void MakeDoc() { |
所达到的效果不同的RenderObject之间均插入了一个分页符:

横向打印
!MISSING PHRASE 'Show All'! !MISSING PHRASE 'Hide All'!
C1PrintDocument 允许为文档指定不同的打印选项和页面设置。页面设置可以通过设计器或者代码指定。通过设计器
- 在Form上选中C1PrintDocument。其属性将显示在VisualStudio右侧面板属性窗体上。
- 找到C1PrintDocument 的PageSettings属性。

- 找到Landscape属性并将其设置为True。则您的C1PrintDocument 将横向打印。

通过代码
通过向Form_Load事件添加以下代码,您可以在运行时修改C1PrintDocument的页面设置:
Visual Basic
Visual Basic |
Me.C1PrintDocument1.PageLayout.PageSettings.Landscape = True |
C#
C# |
this.c1PrintDocument1.PageLayout.PageSettings.Landscape = true; |
运行时
此外,您还有机会在运行文档时,在C1PrintDocument的预览界面修改页面设置,通过页面设置对话框。
- 单击位于工具栏的页面设置按钮。

弹出页面设置对话框。

页面设置对话框包含以下字段:
字段名称 | 描述 |
Paper | 选择纸张尺寸和来源。不同的尺寸种类和来源依赖与选中的打印机。 |
Orientation | 选择打印方向,纵向或者横向。 |
Margins | 自定义C1PrintDocument的页边距(上下左右)。 |
页面设置对话框具有以下命令按钮:
按钮名称 | 描述 |
OK | 应用设置到C1PrintDocument。 |
Cancel | 取消对文档所做的页面设置的更改。 |
Printer | 修改或查看打印机设置。 |
- 找到Orientation字段并选择Landscape选项。您的C1PrintDocument将显示为横向,并将横向打印。

设置页面尺寸
!MISSING PHRASE 'Show All'! !MISSING PHRASE 'Hide All'!
通过PaperKind 属性设置文档的页面尺寸。
- 从工具栏上向您的工程添加C1PrintPreviewControl 和C1PrintDocument控件。
- 单击C1PrintPreviewControl1 选中至属性窗体,设置其Document属性为C1PrintDocument1。
- 添加以下代码至Form_Load事件:
Visual Basic
Visual Basic |
' 构建文档。 |
C#
C# |
// 构建文档。 |
- 添加以下MakeDoc子方法,通过PaperKind属性设置页面尺寸为Legal:
Visual Basic
Visual Basic |
Private Sub MakeDoc() |
C#
C# |
private void MakeDoc() { |
您所达到的效果
默认的页面尺寸设置为Legal:

调整或者缩放图像大小
!MISSING PHRASE 'Show All'! !MISSING PHRASE 'Hide All'!
您可以方便的通过以下步骤将RenderImage缩放为原始尺寸的50%:
- 从工具栏上向您的工程添加C1PrintPreviewControl 和C1PrintDocument组件。
- 单击选中C1PrintPreviewControl1 ,在属性窗体设置Document属性为C1PrintDocument1。
- 切换至代码视图,添加以下命名空间声明:
Visual Basic
Visual Basic |
Imports C1.C1Preview |
C#
C# |
using C1.C1Preview; |
- 添加以下Form_Load事件处理,向页面添加一个图片并将其缩放至原始宽度的50%,高度按比例自动缩放,请将以下c1logo.png替换为自己的图片名称和位置:
Visual Basic
Visual Basic |
Private Sub Form1_Load(ByVal sender As System.Object, ByVal e As |
System.EventArgs) Handles MyBase.Load |
C#
C# |
private void Form1_Load(object sender, EventArgs e) |
您所达到的效果页面上显示一幅缩放过的图片:

添加一个水印图片
!MISSING PHRASE 'Show All'! !MISSING PHRASE 'Hide All'!
通过Watermark 属性向页面添加一幅水印图片。
- 从工具栏上向您的工程添加C1PrintPreviewControl和C1PrintDocument组件。
- 单击选中C1PrintPreviewControl1 ,在属性窗体设置Document属性为C1PrintDocument1。
- 切换至代码视图,添加以下命名空间声明:
Visual Basic
Visual Basic |
Imports C1.C1Preview |
C#
C# |
using C1.C1Preview; |
- 添加以下Form_Load事件处理,通过Watermark属性添加一个水印至页面,请使用自己的图片名和位置替代 c1logo.png:
Visual Basic
Visual Basic |
Private Sub Form1_Load(ByVal sender As System.Object, ByVal e As System.EventArgs) |
Dim pl As New C1.C1Preview.PageLayout()
' 设置水印图像;使用自己的图片替换c1logo.png。
waterMark.Image = Image.FromFile("c:\c1logo.png") waterMark.Y = New Unit(2, UnitTypeEnum.Inch) pl.Watermark = waterMark Me.C1PrintDocument1.PageLayout = pl
' 生成文档。
Me.C1PrintDocument1.Generate()
End Sub
C#
C# |
private void Form1_Load(object sender, EventArgs e) |
您所达到的效果
页面添加了一个水印:

设置初始的缩放模式
!MISSING PHRASE 'Show All'! !MISSING PHRASE 'Hide All'!
设置 ZoomMode属性为ActualSize,PageWidth,TextWidth,WholePage(默认值),或者Custom以设置初始的缩放模式。该属性可以通过设计器或者代码进行设置。通过智能设计器
- 单击PreviewPane浮动工具栏上的Layout按钮以打开Layout对话框。
- 从ZoomMode下拉菜单选择PageWidth:

通过属性窗体
- 在属性窗体找到C1PrintPreviewControl的PreviewPane属性,并展开属性节点。
- 设置ZoomMode属性的值为PageWidth。

通过代码
在Form_Load事件中添加以下代码以设置ZoomMode为PageWidth:
Visual Basic
Visual Basic |
Me.C1PrintPreviewControl1.PreviewPane.ZoomMode = |
C#
C# |
this.c1PrintPreviewControl1.PreviewPane.ZoomMode = |
您所达到的效果
当文档加载时,页面缩放至适合页面宽度的大小:
从上下文菜单中移除一个项
!MISSING PHRASE 'Show All'! !MISSING PHRASE 'Hide All'!
在运行时,默认情况下右键单击C1PreviewPane会出现一个上下文菜单。该ContextMenuStrip包含操作预览的全部设置,包括File,Zoom以及Text工具栏。您可以通过添加一个ContextMenuStrip创建自己的上下文菜单并指定给 PreviewPane.ContextMenuStrip属性。同样您也可以通过添加新的菜单项或者删除已有的菜单项自定义现有的
ContextMenuStrip。
以下示例从上下文菜单移除了标准的"Copy"菜单。完成以下步骤:
- Form_Load事件中向C1PreviewPane的ContextMenuStrip的Opening事件添加一个事件处理函数:
Visual Basic
Visual Basic |
AddHandler PreviewPane.ContextMenuStrip.Opening, AddressOf |
C#
C# |
PreviewPane.ContextMenuStrip.Opening += new |
- 创建该ContextMenuStrip_Opening事件处理,添加以下代码从上下文菜单移除"Copy"菜单项:
Visual Basic
Visual Basic |
Private Sub ContextMenuStrip_Opening(ByVal sender As Object, ByVal e As CancelEventArgs) |
C#
C# |
void ContextMenuStrip_Opening(object sender, CancelEventArgs e) { |
您所达到的效果
当您右键单击 C1PrintPreviewControl控件上的预览面板时,可以注意到上下文菜单上不包含标准的"Copy"菜单项。
禁用上下文菜单
!MISSING PHRASE 'Show All'! !MISSING PHRASE 'Hide All'! 当运行时通过右键单击一个C1PreviewPane时,会出现一个默认的上下文菜单。此上下文菜单包含操作预览的设置。您可以在代码中通过将C1PreviewPane的ContextMenuStrip属性设置为null禁用该上下文菜单。注意,这一操作无法通过设计器完成,只能通过代码做到。但是您可以在设计器中使用您自己的上下文菜单覆盖默认的菜单(通过在Form窗体上拖拽一个ContextMenuStrip组件,并设置C1PreviewPane的ContextMenuStrip至该组件)。当时用
C1PrintPreviewControl控件时,预览面板可以通过控件上的PreviewPane属性进行访问。
在Form_Load事件中添加以下代码以禁用C1PrintPreviewControl控件上的上下文菜单:
Visual Basic
Visual Basic |
Me.C1PrintPreviewControl1.PreviewPane.ContextMenuStrip = Nothing |
C#
C# |
this.c1PrintPreviewControl1.PreviewPane.ContextMenuStrip = null; |
您所达到的效果当您在C1PrintPreviewControl控件的预览面板右键单击时,不会出现默认的上下文菜单。